Ah, Colorado summers—sunshine, open windows, fresh air… and the occasional uninvited flying guest, a.k.a. miller moth.
If you want all the breeze and none of the bugs, now’s the perfect time to give your window screens a good check-up.
Let’s walk through a simple, step-by-step way to inspect, clean, and repair your screens, so you can enjoy a bug-free breeze all season long.
Step 1: Inspect Your Screens
Start by giving each screen a once-over. Look for:
- Small holes or tears (even tiny ones can let bugs in!)
- Bent or broken screen frames
- Loose or sagging mesh
🛠 Small holes can be patched with a screen repair kit—most come with sticky patches or mesh tape that blend right in.
Step 2: Replace the Whole Screen (if needed)
Sometimes patching isn’t enough—especially if your screen is torn, warped, or just plain tired. The good news? Replacing it is easier than it sounds!
Here’s what you’ll need:
-
- Replacement screen mesh (sold in rolls at hardware stores—fiberglass is easiest to work with)
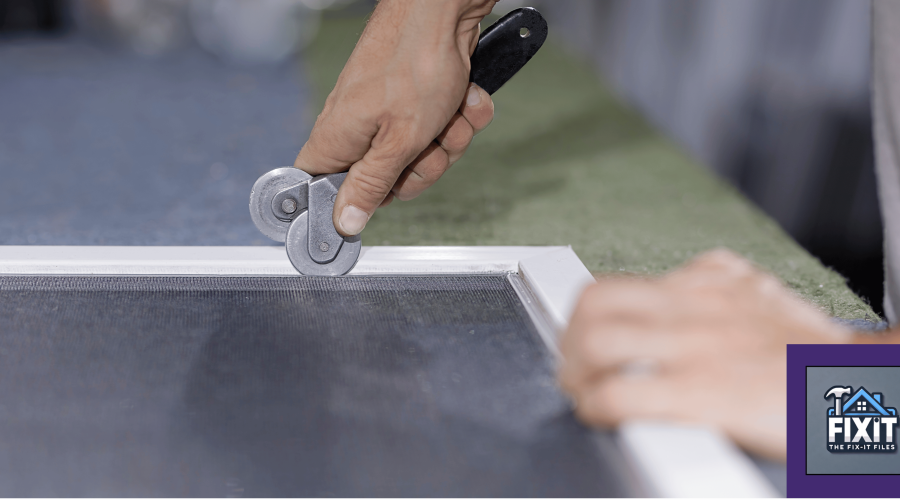
- A spline roller tool
- New spline (the flexible cord that holds the mesh in the frame)
- Scissors or a utility knife
- A flat surface to work on (a table works great!)
How-To:
-
-
- Remove the screen frame from the window and lay it flat.
- Use a flathead screwdriver to gently pry out the old spline (the rubbery cord holding the screen in).
- Peel off the old screen mesh and toss it.
- Roll out your new screen mesh over the frame. Leave at least an inch of extra mesh on all sides.
- Place the new spline cord over the mesh and into the groove of the frame.
- Using the spline roller, press the cord firmly into the groove all the way around the frame. This secures the mesh tightly.
- Once everything is snug, use a utility knife to trim off the extra screen mesh just outside the spline.
-
🎉 Done! You’ve got a brand-new screen ready to keep pests where they belong—outside.
Step 3: Clean the Screens
Clean screens not only look better, they let in more light and fresh air. Here’s a quick refresher:
- Vacuum or brush away loose dirt and cobwebs.
- Gently wash screens with warm water, dish soap, and a sponge.
- Rinse with a hose or spray bottle.
- Dry with a towel and let air-dry completely before reinstalling.
Bonus: While your screens are out, take a minute to wipe down the sills and window tracks. It’s a great time to refresh the whole setup!
Why It Matters
These little home maintenance wins go a long way in boosting comfort and saving money. Clean, well-sealed screens protect your home, reduce indoor allergens, and help keep pests out without constantly relying on the A/C.
At DreamMaker Bath & Kitchen of the Pikes Peak Region, we’re here to help you love every square inch of your home—inside and out. Give us a call when you are ready for a remodeling refresh for your home.
